Building a High-Performance Home on a Realistic Budget: Three Decisions to Get Right Early
2026-11-02
Lime rendering is a beautiful way to finish a natural building, offering a breathable, textured surface that complements materials such as straw bale, cob and light earth. But getting the finish right can raise plenty of questions, particularly when it comes to cracking, render thickness, mesh placement, the final coat and how to achieve a consistent appearance. These are questions that often come up during a natural building project, especially when the walls are curved, shaped by hand or finished with several layers of render.
Drawing on questions and experiences shared by natural builders, here are some practical considerations to keep in mind when working towards a durable, attractive lime render finish.
How many coats of lime render do you need?
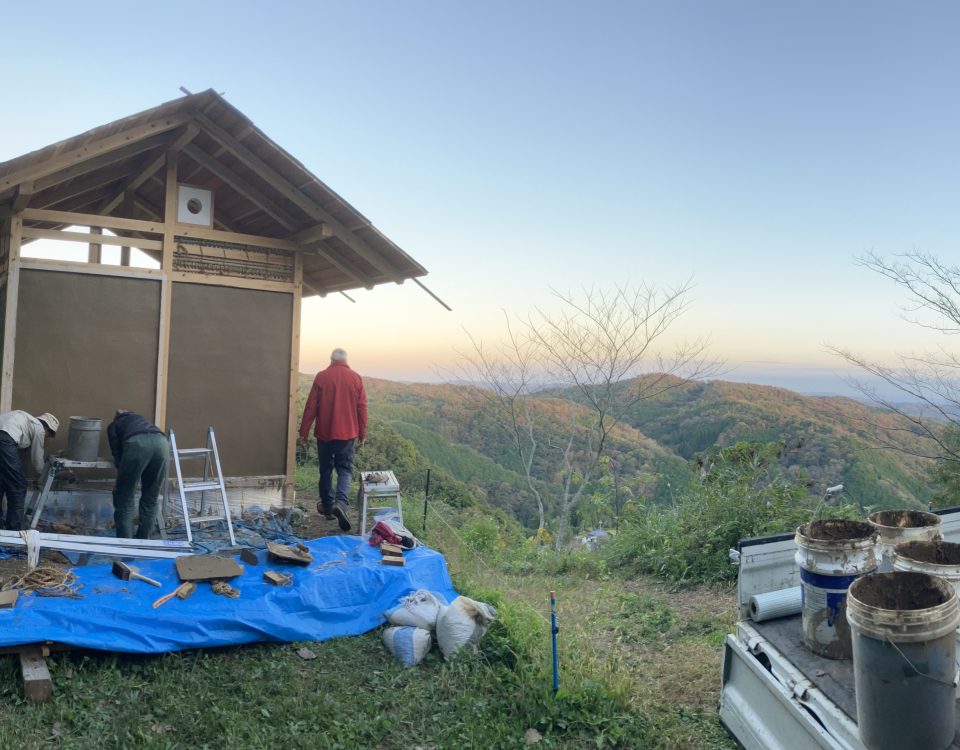
The number of coats will depend on the wall construction, the condition of the substrate, the thickness required and the finish you are aiming to achieve. One natural builder working on straw bale walls described applying a first coat approximately 10mm thick, pressing the lime render into the straw so that it properly engaged with the surface. In some places, straw remained visible through the initial coat. A second coat, approximately 12mm thick, was then applied to smooth and shape the walls, with fibreglass mesh incorporated into the process.
The builder was preparing for a third coat and was aiming for approximately 35mm of render overall, with some variation in thickness because the walls were curved and had been shaped using cob and light earth. This raised an important question: should the wall receive another one or two coats, and how thick should the final coat be?
There is no single thickness or number of coats that suits every natural building project. The appropriate build-up depends on the particular render system, substrate, exposure and desired finish. Where a specified total thickness is required, it is important to consider how that thickness will be achieved across the wall rather than simply adding material everywhere.
Curved walls, corners and reveals can create areas where the render becomes considerably thicker. These areas need particular attention because the material may behave differently as it dries. Before applying the finish coat, take the time to assess the overall surface and identify where further shaping or correction is needed.
Getting the mesh in the right coat
Fibreglass mesh is often used in lime render systems to help manage cracking and provide a more consistent substrate for the finishing coat. However, its placement matters.
In the discussion, the advice was to use mesh in the second-to-last coat, after the wall has been brought to the required thickness and shaped. The mesh is not intended to provide structural reinforcement or to hold the plaster into the straw bales. Instead, its role is to help mitigate surface cracking and create a more consistent base for the final finish.
This distinction is important when planning the render layers. If the first coat has already been pressed into the straw and the second coat has been used to smooth and shape the wall, it may not be possible to incorporate mesh in the intended position without changing the approach.
For areas that require additional shaping, such as corners and reveals, the discussion suggested using a render with a higher fibre content. Chopped straw and, in some traditional mixes, manure can provide additional reinforcement and help the material work in thicker areas. The appropriate mix will depend on the materials being used and the requirements of the particular render system.
Why should the top coat be thin?
Once the wall has been properly built up and shaped, the final coat is generally intended to refine the surface rather than make up substantial thickness.
One recommendation from the discussion was to keep the top coat around 5mm or less, with a skim coat used where appropriate depending on the desired finish. The reasoning is that the earlier coats should already have established the wall’s thickness, shape and surface.
A finish coat applied too thickly can introduce additional drying and shrinkage challenges. This is particularly relevant where the wall has uneven thickness, as can happen with rounded or hand-shaped natural building walls.
Rather than relying on the top coat to correct significant imperfections, aim to get the underlying render as even and well-shaped as possible. A thin finishing layer can then provide the texture and appearance you want without needing to compensate for problems in the earlier coats.
Always check the recommended thickness and application method for your particular lime render product or mix.
Cracking, imperfections and achieving a consistent finish
Cracking is one of the most common concerns when rendering natural buildings. It can occur for a range of reasons, including uneven drying, excessive thickness, movement, substrate conditions and the characteristics of the render itself.
One builder shared that their render had cracked while drying on the southern side of the house. They subsequently applied a thin lime whitewash, which helped make the cracks less noticeable. After several years, they reported that the whitewashed surface had remained in good condition and could even be spot-cleaned when dirty.
This experience highlights how a limewash finish can sometimes improve the appearance of a wall without requiring the entire surface to be re-rendered. However, limewash should not be treated as a repair for significant cracking, movement or underlying render problems. Those issues need to be assessed and addressed before applying a finish.
For smaller imperfections, seams and variations in texture, the first step is to determine whether they are simply aesthetic or indicate a problem with the render. Minor surface irregularities may become less noticeable once the wall has a consistent colour and finish. A limewash can help unify the appearance, but it will not necessarily conceal every imperfection.
Limewash, casein and protecting the final surface
The choice of finish can make a significant difference to the appearance and maintenance of a lime-rendered wall.
A simple limewash made from lime and water was one approach shared in the discussion. One homeowner reported that their thin whitewash had lasted approximately three and a half years, with little concern about dusting and good results when cleaning occasional marks.
Another suggestion was to add a small amount of salt and coloured oxide to limewash to achieve an off-white colour. Pigments can be useful for creating a more consistent appearance, but colour matching requires careful preparation.
When working with coloured finishes, it is important to consider how different batches will compare. One builder described preparing the required batches in advance and storing them separately, then mixing smaller quantities together during application. This helped reduce noticeable colour variations across the wall.
Casein was also raised as a possible ingredient for improving the finish. Casein-based paints and coatings can be useful in some natural building applications, but their suitability depends on the specific product, substrate and intended use. A compatible, breathable finish is particularly important when working with lime render.
The discussion also included a recommendation for a natural silicate-based paint, such as a suitable KEIM product, as an option for additional protection and durability. Before applying any coating, check that it is compatible with the lime render and appropriate for the wall’s exposure conditions.
One clear caution from the discussion was to avoid using linseed oil as a finish on lime render. Oil-based treatments can alter the surface characteristics and moisture behaviour of the render, so they should not be added without understanding their compatibility with the particular system.
The key takeaway
A successful lime render finish starts well before the final coat. Build the required thickness, shape the wall carefully, place mesh in the appropriate layer and use the finishing coat to refine the surface rather than correct major irregularities.
For natural builders, the experiences shared here are a useful reminder that there is no single recipe or finishing technique that works for every wall. The substrate, climate, render composition, thickness and desired appearance all influence the result.
Take time to understand the materials, test your finish on a small area and follow the recommendations for your particular lime render system. A thoughtful approach to each layer can help you achieve a beautiful finish that complements the natural building beneath it.
References:
YourHome – Straw Bale
Tŷ-Mawr Lime – Straw Bale Plaster/Render Application Guide
Tŷ-Mawr Lime – Hydraulic Lime Plaster/Render Application Guide
Tŷ-Mawr Lime – Lime Plaster Cracking
Tŷ-Mawr Lime – Limewash Cracking
Lime Green – Background Preparation for Lime Rendering
Conserv – The Lime Render Guide
Best of Lime – Lime Render Surface Guide
International Organization for Migration – Lime-Stabilized Construction Manual
Northern Ireland Department for Communities – Historic External Wall Finishes
New Forest National Park – Plasters and Renders